Tool Organization

I love helping people organize their tools. My love of organizing tools goes way back. I attribute a lot to the rigorous training I had, starting at age 7, at a very old-fashioned Virginia horse riding school that had been founded in the 1950s. In college, studying architecture, it was very important to be able to keep track of lots of little pieces of wood and foam core, and sharp X-acto blades for building models. I then graduated with a BFA in Crafts, so had a foundational understanding of fibers, ceramics, metal, wood, and glass equipment, plus general sculpture supplies such as plaster, wax, and rubber. After school, I worked for years as a production glassblower, where having the right tool on hand at the right time was absolutely paramount. I needed to know exactly where the tool was, if it needed to be hot or cold, lubricated with wax or wax-free, wet or dry. There simply was no margin for error when you’re working with a material as particular as glass. Time was always of the essence. Spending time looking for the right tool was just not in the cards. The glass would cool down and break. In grad school, I loved how seriously everyone took shop-clean up sessions. We even had a slip casting teacher, Frank Bosco, who I dearly adored, who would sometimes spend the majority of class (slight exaggeration) educating us on the proper way to clean buckets. These were my kind of people! Lol.
Needless to say, I feel very at home when I’m helping someone organize their workshop. Even though I’m not an expert in all types of materials, I’m able to apply what I know about tools, production, workflow, cleanliness, efficiency, and safety, to many different types of workshops. In addition to basic types of tools and art supplies, I’ve also helped many clients organize their car tools, computer/electronic tools, and lots of different specialty tools. I decided to create this post to give you some tips and inspiration for organizing your tools.
- Create a staging area for:
- Give away (possibly broken up into sub-categories such as Goodwill, tool-share or specialty donation sites, Buy Nothing, material or building re-use stores etc).
- Trash/Recycling (large trash to take to the dump)
- Hazmat (check your local guidelines for what they take)
- Sell. When you put things in this category, really weigh your options on whether it’s worth your time and energy to post the item, communicate with potential buyers, schedule a time to meet with them, and do the transaction. Selling items takes a considerable amount of effort, and it’s often best to just donate the items.
- “Go through later”. When you’re organizing your tools, be careful to not distracted by going through a bunch of sentimental paperwork or getting caught up in the weeds sorting through lots of little items. Save those for later.
- Go for the low-hanging fruit. What can you easily put into these categories listed above? Look for anything that you know you want to donate, trash/recycle, send to hazmat, sell, or that needs to be gone through later. In addition to that, is there anything that doesn’t belong in your tool storage area? Sometimes people dump large items such as fake Christmas trees, mattresses, furniture, and other items that they just don’t want to deal with. Make some decisions on where these things are going. Have you been storing something for someone else? Now is the time to call that person to have them come pick up their items.
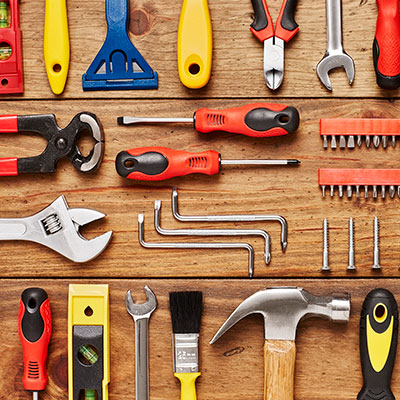
- Take stock of what’s left. Usually at this point, it’s time to do some sorting of materials such as wood scraps (and yes, I know how valuable those can be!), hand tools (hammers, screwdrivers etc), power tools (drills, saws etc), and fasteners (screws, nails etc). Use basic bins, boxes, or bags (whatever is easily available) to help you sort these items. After you’ve done more sorting, you may have found more items that can get purged.
- Do you already have a system in place for storing your tools and supplies? You may already have the right drawers, pegboard system, or shelving system that works great for you, you just need to put things back where they belong. If you don’t have a system that works for you, now that you have your items sorted, it will be easier to visualize what will work best for your workspace, the types of tools you have, and they type of work you do. Do you need your tools to be mobile? Or will you be doing the majority of your work where you store your tools? Do you like to see what you have all at once (like a pegboard allows), or do you like to keep your tools stored in drawers out of sight? Use this step to assign homes for your items. When I’m working with clients, I’ll talk to them about all the different options for their unique situation. If you’re a DIY’er, do a Google image and Pinterest search for “tool organization” to see what inspires you.
- After you’ve decided on the system you’d like to use (shelves, movable carts, tool boxes, pegboards etc), will you need additional bins to keep like items together? Since you’ve already sorted your items, it should be pretty easy to now make a list of the sizes and shapes of the bins you’ll need. Make sure to write these down, along with any other measurements you may need. Taking photos that also show the necessary measurements will help a ton. With the photos, it will be easier to determine how much margin you have if the store doesn’t carry the exact sized bin you want.
- Do you have everything you need to organize your tools in the way you want? At this stage, it may be time to take a trip to Home Depot, Container Store, Target, search Craigslist, or build some shelves. This way, you’ll have the proper infrastructure to house what you need, and right sized bins to containerize like items.
- Once you’ve created your infrastructure and containerized everything, make sure to create accurate, easy to read labels, so you (and others!) know where things belong. This will make it easier to find things when you need them, and will make it easier to put things away. I’ve found a lot of clutter accumulates because items don’t have “homes”. By creating clear homes for everything, it will help you create positive experiences around cleaning up and will easily reinforce that habit.
- Even though everything has found a home now, life ebbs and flows. Projects change, and dust builds up. Does it make sense for you to schedule a “shop clean up” daily, weekly, monthly, quarterly, or yearly? Carve out some time to reinvest into your sweet workshop, and keep those creative juices flowing!
What’s your favorite tool organization system?
Send me a message, I’d love to hear about it!

By Jean Prominski, Certified Professional Organizer
Download my free 5 week journal The Seattle Sparkle Method to Get Organized and Stay Organized
Sign up for my free 4 Day Color to Declutter Challenge.
Become part of a like-minded community by joining my Facebook Group, Declutter and Organize with Seattle Sparkle.
Ready to book a consultation? Complete this form.
For artwork to energize your home, order through jeanprominski.com or on Etsy.


