Picnic Organizing

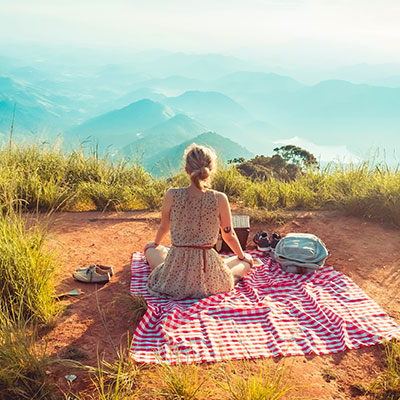
I hope everyone had a lovely solstice! I had a lovely picnic celebration at the beach. Going on picnics is one of my favorite things to do, so I decided to do a blog post about picnic organization. Picnics come in all shapes and sizes. The big questions to ask are: How many people will be there? Where will it be? How will you get there? And what will you eat? You can have a picnic on your own, with others, or with a large group. Deciding on how many people will be there will be helpful when prepping for the picnic. You may want to bring everything yourself or delegate tasks to others. What are the “accommodations” available at your chosen picnic spot? Are there picnic tables available? Do you need to make a reservation for a table? Do you need to bring your own chairs? Or will you be bringing a picnic blanket to sit on? Once you decide where the picnic will be, you can start to think about how you’ll get there. This will be important so you’ll know how to pack and may help inform the type of food you want to bring along.
For all picnics, remember to bring along your sunscreen and hand sanitizer!
Basic Picnic # 1
If you’re new to picnics, or just love them so much that you do them on a regular basis, this is an easy place to start. I do this one just about every weekend! It’s the solo picnic (or “picnic with the dog”). Friends are also welcome to come along, but packing for this is usually autonomous.
Location: an easy walk from home (or from your car)
How to pack: Lightweight purse or backpack.
What to bring: Bottle of water, some simple snacks such as Epic bars (Paleo friendly), nuts, dates, or whatever is easy to bring, a bowl for your dog’s water, dog treats/ chews, and a lightweight travel blanket. Blankets like these can fold up into a small pocket sized pouch. If I’m going alone, I’ll often bring my headphones, my kindle, or a sketch book.
Basic Picnic # 2
Once you’ve mastered Basic Picnic #1, try Basic Picnic #2. This can also be done alone or with friends. Packing food for these types of picnics can be autonomous, or collaborative.
Location: a slightly more rigorous walk from home (or your car)
How to pack: Backpack that can accommodate a picnic blanket. There are “picnic backpacks”, but I use a Stella and Dot “Crush It” yoga backpack and roll up my blanket instead of a yoga mat. The blanket for this trip can be larger and thicker than Basic Picnic #1.
What to bring: If you have a dog, bringing a bottle of water is the most simple, since you can pour the water into your dog’s bowl. Alternatively, if you want to bring another type of drink, make sure to bring a bottle of water and bowl for your dog. Since you’re bringing a bigger backpack, you can bring bigger food, such as a sandwich, a salad, or even hot food if you have a good container for it. This is my favorite container for hot food. (Make SURE to get the version with the button to depressurize the container… I have had a few failed picnics with the older model!). Don’t forget the necessary utensils so that you can eat your food. Again, If I’m going alone, I’ll often bring my headphones, my kindle, or a sketch book, but since my backpack is bigger, I may also bring along another magazine or additional art supplies like watercolors. And of course, don’t forget the blanket!
Picnic At a Table
If you know of a good park with picnic tables available, you can plan for a more elaborate picnic. Usually these places have parking close by, so you can bring more goodies to the picnic, and don’t have to worry about it all fitting into a backpack.
Location: Park with picnic tables
How to pack: Coolers, either soft insulated bags, or hard plastic traditional coolers. A wagon is often helpful to get items from the car to the picnic table.
What to bring: Bring along an assortment of drinks and possibly cups, depending on the beverage. You can either prepare food (or get takeout) ahead of time, or bring cold cuts to assemble sandwiches or salads on site. Don’t forget anything extra you like to much on such as chips/guacamole, fruit, dessert, or whatever else you like to eat! For this type of picnic, remember to bring along plates, silverware, napkins, and serving tongs if necessary. I recommend choosing to bring reusable plates etc. vs. paper ones if you can. Bring a trash/recycle bag, a table cloth, and possibly additional table cloths to use to cover the seats if they are wet. And of course, if you’re bringing your dog, remember the water, bowl, and treats!
Advanced Picnicking #1 (the propane grill!)
One of my most memorable picnic experiences was when I was on a fly-fishing trip in Montana. We had spent all morning in the boat, and our guide had brought along a travel propane grill + food to grill for our lunch. We docked the small boat on an island on the river and the guide grilled chicken and veggies for my friend and me. It was delicious! He used a compact rectangular Weber propane grill.
Location: An island on a river in Montana (or really anywhere you want where it’s safe to grill!)
How to pack: We used a boat, but a wagon could also be another great option. Use coolers to keep raw food fresh.
What to bring: If you’re traveling in a boat, that’s a whole separate list, so I’ll keep it simple here. Prep food to grill and pack it safely in a cooler with some ice packs. Travel picnic chairs can come in very handy for a picnic like this. Make sure to bring the grill, grill brush, propane, a lighter, tongs, wet wipes, plates/silverware/napkins, drinks, and the food you want to cook. You may also want to have an oven mitt or silicone hot pad. Also make sure to have a container with water so that you can put out any rogue flames if necessary. Bring a trash/recycle bag too. As always, if you’re bringing your dog, remember the water, bowl, and treats!
Advanced Picnicking #2 (the charcoal grill!)
I have so many good memories of watching grill masters be able to tend to the grill, socialize, then come back to the grill at JUST the right time. It’s really an art! I love grilling on charcoal, but have to admit, I’m not as much of a pro as the late Bennett McKnight (RIP). I have a portable rectangular Weber charcoal grill (almost identical to the propane version from the boat trip). A picnic like this can be done remotely (like at a park) or in a back yard (using a small portable grill if there are just a few people) or on a larger full sized grill.
Location: A beach that allows fires, campsite, or somewhere that you can use a charcoal grill responsibly. You’ll want to make sure you have a fireproof place to put the grill, the charcoal starter chimney, and where there isn’t a lot of dry grass or other fire hazards. When you’re starting the charcoal, it usually makes a lot of smoke. Be sure you’re not starting this too close to anyone else’s home, because they might not appreciate the smoke.
How to pack: Depending on your location, you may want to bring a wagon to help carry all your gear (which is significantly more with a charcoal grill vs. propane grill). Use coolers to keep raw food fresh.
What to bring: What you’ll want to bring on this is similar to Advanced Picnicking #2, but instead of a propane grill and propane, you’ll need a charcoal grill, charcoal, and a charcoal starting chimney. Prep food to grill and pack it safely in a cooler with some ice packs. Travel picnic chairs can come in very handy for a picnic like this. Make sure to bring the grill, grill brush, charcoal, chimney, newspaper and fire-starter, a lighter, tongs, wet wipes, plates/silverware/napkins, drinks, and the food you want to cook. Make sure to also bring lots of hand wipes, as charcoal grilling is exceptionally messy. You will also want to have an oven mitt or silicone hot pad. Also make sure to have a container with water so that you can put out any rogue flames if necessary. Bring a trash/recycle bag too. As always, if you’re bringing your dog, remember the water, bowl, and treats!
Special instructions: To get the coals lit, load up the bottom of the chimney with newspaper, and possibly a small fire starter. Fill the container with coals and set on top of the open grill (take out the top grill rack and have the chimney set on the base grill rack. Open up the bottom vents to maximize air flow. Light the newspaper in several places and make sure the flames catch the charcoal. (Bring extra newspaper just in case). Once the coals at the top start to turn grey on the edges, they’re ready to dump onto the base level of the grill. Spread them out evenly. Put the top grill rack on the grill, let it heat up, and use your grill brush to scrape off any old grill residue. Once you’ve finished grilling and are ready to put out the coals, close the vents to the grill. This will cut off the oxygen to the fire which will eventually put the fire out. After it’s fully out, dump the coals out in a safe place out (like a fire pit), spread them out, and use lots of water to make sure they are completely extinguished.
What’s your favorite picnic food or picnic gadget? Send me a message, I’d love to know about it!

By Jean Prominski, Certified Professional Organizer
Download my free 5 week journal The Seattle Sparkle Method to Get Organized and Stay Organized
Sign up for my free 4 Day Color to Declutter Challenge.
Become part of a like-minded community by joining my Facebook Group, Declutter and Organize with Seattle Sparkle.
Ready to book a consultation? Complete this form.
For artwork to energize your home, order through jeanprominski.com or on Etsy.
Photo Credit: Willian Justen De Vasconcellos


