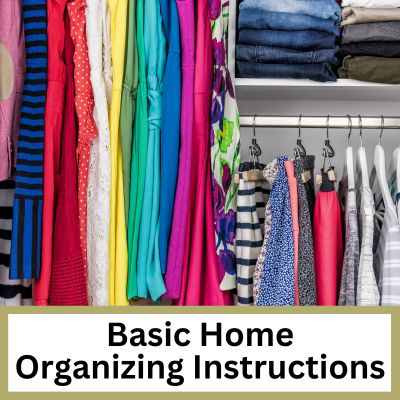
Basic Home Organizing Instructions

Do you want to get organized but don’t know where to start? Here is a guide for organizing anything in your home! I’ve included my number one recommendation (to make sure you’re energetically charged), plus a few simple tips to help you when you get stuck.
1- My number one recommendation is to make sure you’re energetically charged to do your organizing. This may mean that you need to be sure to fuel and hydrate your body well so that you’ll have the stamina. It may mean making sure to get a good night’s sleep prior to your organizing session and to be mindful of pacing yourself. You may want to turn on your favorite music to get you into the flow. Or it could mean that you light a candle, use some crystals, or even say a prayer before doing your work. Or maybe it’s all of the above! Once you’ve got your good mojo flowing, here are my basic instructions for getting organized.
2- Decide what you’re going to organize. Sometimes it can be hard to decide, and that’s ok. You may need to bounce around a little until you can get your focus into the groove. Depending on the level of disorganization you’re dealing with, you may choose to pick a category of things to organize, or you might want to pick a location (such as an entire room, a closet, or a single drawer) to organize. Neither is right or wrong.
3- Do a quick purge. Get rid of anything that you obviously don’t need/want or things that are expired. Have clearly identified receptacles for trash, recycle, donate, and shred.
4- Take everything* out of the space you are organizing, and SORT the things into similar categories. Or if you’re organizing by category, group like items from a variety of locations (if possible). (More on that below). *(depending on how much time you have and how much of a mess you’re willing to make).
5- Organizing is really just a combination of sorting and purging. Sometimes it’s heavier on the sorting, and sometimes it’s heavier on the purging. For this step, PURGE the excess. Be sure to connect with your heart (rather than just your logic) to tune in to what still holds importance to you. If you rely on your logic too much, you can get stuck in your head. Your heart knows what you need.
6- Vacuum/sweep/wipe the [shelves/floor/drawers] down from the space you just cleared.
7- Decide where things will belong. Depending on how much of your home needs to be organized, this may just be a temporary location until you can get other places purged and organized. You may also need to assemble shelves or other furniture so you’ll stuff will have a place to go.
8- Use bins to containerize like items. (Use whatever bins/cardboard boxes/bags you have on hand to see what size you’ll need, and then purchase new ones if necessary).
9- Label the bins either with a label maker, printed labels from the computer, or handwritten labels. (Use blue tape and a sharpie or post-it notes until you’re sure of what and where the more permanent labels will be.) Label the corresponding shelves/drawers (if you want) so you know where the bins go. Or you could just label the shelves instead of the bins.
10- Keep up the good work! Create a cleaning schedule for yourself so you remember to maintain your organization. Depending on how heavy handed or neat you are will dictate how often this needs to happen.
TIPS
–When using bins, I recommend using what you have first. Even just cutting down small/medium sized Amazon boxes or using plastic Ziplock bags will help you see what sized plastic bins you need. I don’t have a particular kind that I recommend. If you’re going for function, you can get packs of about 4-5 clear plastic Sterilite shoe boxes from places like Target. They come in a couple different sizes. Those are the most versatile and usually the cheapest. You can also find “prettier” bins at Target/Container Store etc, but I usually just go for the clear plastic ones. Having all the bins be similarly colored/shaped will also help the aesthetics.
-When in doubt, SORT! This means, define your own categories (such as books, office supplies, “black hole” (emotionally charged and not ready to deal with yet), etc. and sort things into these categories. Keep categories broad (such as “art supplies”) until you have the space and bandwidth to refine those categories into smaller categories such as “watercolors”, “paint brushes”, “glue” etc.
-When organizing by category, I recommend gathering ALL of the items in the category together. Let’s use the example of books. Ideally, this would mean gathering ALL your books together in one place. HOWEVER, if you’re a huge book lover with bookcases in various rooms for various topics, you’re probably thinking “heck no, I’m not doing that!”. I respect that. It’s not for everyone. If this is you, do what you can to minimize the books you don’t want (you’ll never read, you’re keeping out of guilt, you didn’t like, that smell musty, etc). Pick a few distinct spots where you want to have books rather than letting them be scattered all around the house.
-Create a hardcopy list/chart for yourself where you can physically check off boxes that you’ve done the task you’ve set out to do. It’s fun to see your accomplishments tallied, and you get a double reward of an organized space!

Posted By Jean Prominski, Certified Professional Organizer
- Follow me on Instagram @seattlesparkle
- Join my Facebook Group, Declutter and Organize with Seattle Sparkle.
- Ready to book a consultation? Complete this form.
- Download my free 5 week journal The Seattle Sparkle Method to Get Organized and Stay Organized
- Check out my media exposure: Seattle Sparkle in the Media
- For artwork to energize your home, order through jeanprominski.com.


